WordPress themes play an essential part in shaping the design and functionality of your website. Whether you’re starting a blog, online store or portfolio site. Selecting an eye-catching and user-friendly design theme is vital for creating an inviting user experience on any platform. Hostinger offers an accessible hosting service to host WordPress websites while installing themes. In this guide we’ll outline step-by-step process of how you can install one using Hostinger.
Accessing Your WordPress Dashboard

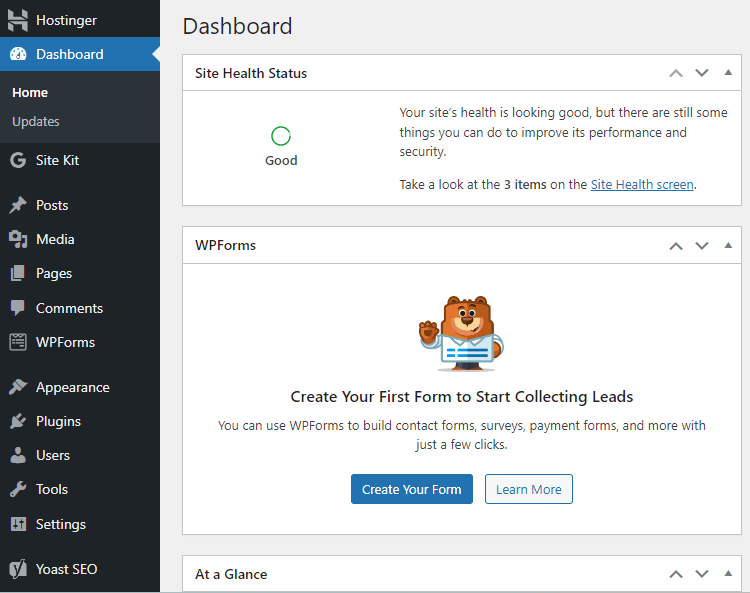
To get start, log into your Hostinger account and head to the WordPress section. From here, navigate to any installation you wish to work on by clicking “Manage,” which will take you directly into its Dashboard where all aspects of your site can be manage easily.
Navigating to the Themes Section

Once in the WordPress dashboard. Locate and click on “Appearance” in the left-hand menu to expand a submenu with options related to site appearance; from here select “Themes” as your option of choice to proceed.
Selecting a New Theme

The Themes section displays a list of currently installed themes on your website. To add one, use the “Add New” button located near the top of this page. This will take you directly to WordPress Theme Repository where you can search thousands of free and premium themes available there.
Installing the Theme

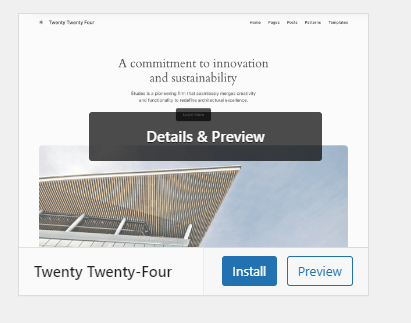
When looking for the ideal theme to meet your needs. Either browse through or use the search bar to narrow your options down. Once you find one you like, hover your cursor over it and click “Install.” WordPress will download and install it onto your website automatically.
Activating Your Theme

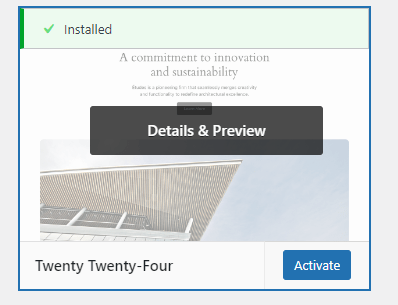
Once the theme has been successfully install, a confirmation notification will appear confirming its installation. To activate it immediately, click the “Activate” button that appears – WordPress will apply your new theme instantly! You’ll see changes instantly!
Customizing Your Theme (Optional)

Once your theme has been activated, you can personalize its appearance and settings to suit your individual needs. Navigating to “Customize” under Appearance provides access to theme customization options. Here, you can alter colors, fonts, layout and other aspects to give your website its unique appearance.
Previewing and Publishing Your Changes
As you make changes to your theme settings, the customization panel allows you to see them live in real-time. When satisfied with what has been accomplished. Press “Publish” to make them live on your website for all visitors to see.
Thanks for Reading this article for more information please visit. www.blogingtips.com
FAQs
Are custom themes purchased from third-party websites compatible with Hostinger? Yes.
Yes, Hostinger allows for the easy installation of custom themes purchased from third-party websites. Simply download them from their source before uploading and installing using “Add New” feature of WordPress dashboard.
Will installing a new theme affect my existing content?
Installing a new theme should have no negative effect on existing posts, pages, or media on your site. However, its appearance or layout could vary depending on its design.
Are there any compatibility issues I should keep in mind when installing themes on Hostinger?
While Hostinger’s WordPress hosting platform should ensure compatibility between themes and your version of WordPress and any plugins installed. Doing this can help prevent issues or conflicts.
Can I switch back to my previous theme if I don’t like the new one?
Absolutely – any time. Simply navigate back into your WordPress dashboard’s Themes section. Locate your previous theme, and click on its “Activate” button in order to restore it.
Do I Need Coding Skills to Customize my WordPress Theme on Hostinger?
No coding knowledge is required in order to customize a WordPress theme using Hostinger; its user-friendly customization panel enables easy point-and-click controls for customization of appearance and settings for any WordPress theme.


